The Scrap Quilt
(for a picture of a finished quilt see here)
This quilt is great for using up any scraps, spare strips etc which you have collected. The quilt can be worked a little bit at a time - depending on how many scraps you have. If you only have enough for a couple of blocks, fine - do them, and then wait for more scraps (or raid a friend's scrap basket). If you can do a whole quilt - great.
I sort my scraps by colour, but these blocks also look fantastic multi-coloured. This tutorial is based on a finished block size of 6" but you can work to any size you like.
Before you start
I find it easier to have all my scraps ironed and sorted into small, medium and large before I start. Anything from about 2" is fine.
 Step 1
Choose some small scraps to work with and sort into pairs. I find working on about 6 to 10 blocks at a time is best for me. This means I don't have to get up and down to the iron after every seam. The pairs don't have to match exactly but should have one edge which is roughly the same length.

Step 2
Put the paired fabrics right sides together and sew down the matched side using a quarter inch seam. You can 'string-piece' the pairs. This means you don't cut your cotton after each pair - just leave a small 'string' and then feed the next pair through the machine. The pieces will come out attached together and can then be snipped apart with small scissors.


Step 3
Carefully iron the seams to one side on each pair - making sure that the fabrics lie flat on the right side.
You should now have several sewn pairs:


Step 4
Sew a third scrap to each pair. Make sure you sew a straight seam each time - in the photo on the left I've used a strip which roughly matches one side of the pair.
In the photo below, the scrap I'm attaching has a straight edge which I'm using to line up the seam. The piece underneath does not have a straight edge, but I'm ignoring this while I sew.
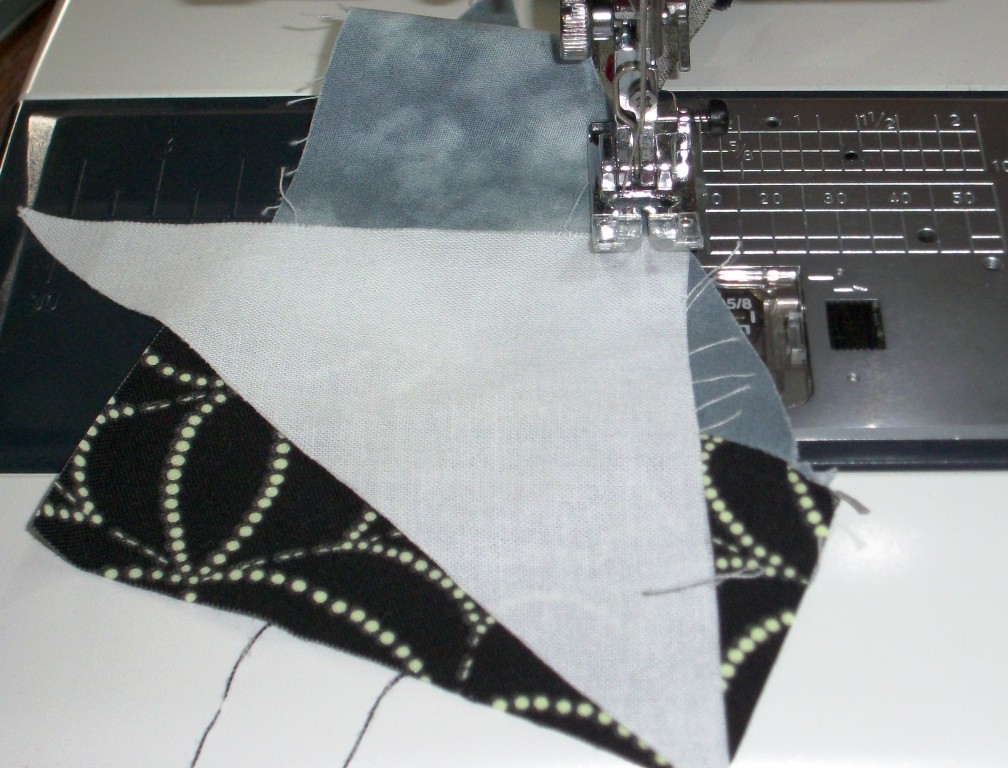

I can just trim the seam after I've sewn it.
Step 5
Keep working on each piece in this way - attach a scrap, trim the seam allowance and iron the seam to one side. The main point is to make sure that when you attach a piece, any raw edge are enclosed underneath.
The blocks should grow roughly square, but if you find them growing too much in one direction, you can cut them in half and work on each piece separately.

Keep going until your piece measures more than 7 inches both ways.

Step 6
When your piece is large enough, use a six and a half inch square ruler to choose your block. I like to place the ruler at an angle to get more interesting angles and shapes in the block.
If you don't have a square ruler, make yourself a template. Cut a six and a half inch window into a larger piece of card and you can then use this to choose your block.

Step 7
Cut out your block - I use a rotary cutter to cut my squares, but if you don't have one, then draw the edges with a pencil and cut with scissors.
Don't dispose of the offcuts - you can use this as the starter piece for your next scrappy block.
Make as many blocks as you need for your quilt!!
I think thats worked really well!
ReplyDeletereally clear instructions, thank you. I love the tip of cutting the final square on an angle - and keeping the bits you trim off to start another block
ReplyDeleteThat looks gorgeous, I unfortunately am not a sewer.
ReplyDeleteThe tutorial is great, I definitely going to use up some of that fabric making one of these!
ReplyDelete